Notifications
Site Tour by Auto Logging with the Test User plugin allows your users to automatically log in to your community as a test user so they can experience the platform and features before deciding to register.
Initial Setup & Configuration
Log in to your SocialEngine Admin Panel.
Navigate to the Plugins section.
Click Install and Manage Packages and search for Site Tour by Auto Logging With Test User Plugin
Install the plugin and return to the admin panel
Go to Enabled Plugins and find the Site Tour by Auto Logging With Test User Plugin
Go to Settings and then click Activate to use the plugin
The Global Settings section lets you configure the basic settings for the Site Tour with Test User Plugin. Here, you can enter your license key and customize the text displayed in the Test User box.
Heading Text of Test Users Box
Enter the heading that you want to display at the top of the Test User box. This helps visitors understand that they can use the available test accounts to explore your community.
Add the text for your headline and don't forget to hit Save Changes.

On the user side, a new visitor clicks Sign In to explore your website. 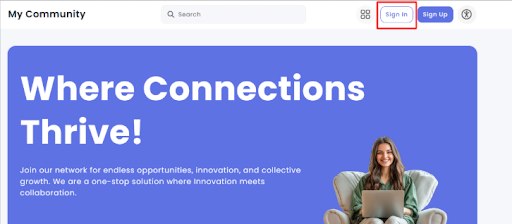
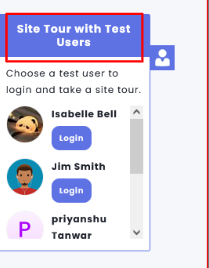
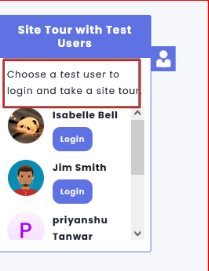
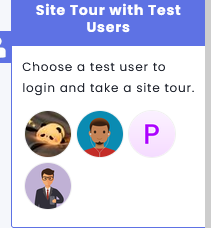
A small Test User box opens and displays the available test accounts.
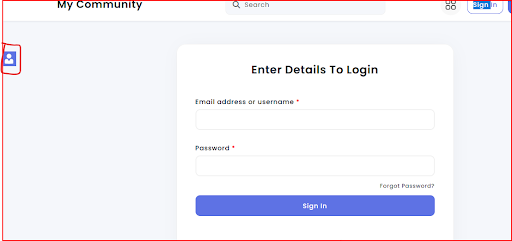
The heading you entered in this setting appears at the top of the Test User box, helping visitors understand its purpose.
Description Text of Test Users Box
Enter a description to display below the heading in the Test User box. This helps visitors understand the purpose of the box and lets them know they can use the available test accounts to explore your community.

On the user side, visitors can view the description directly below the heading in the Test User box. This provides additional information about the available test accounts before they log in.
Test Users Box Placement
Choose where you want the Test User Slider Box to appear on your website. You can display it on either the left or right side of the screen.

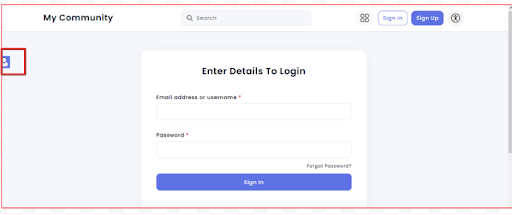
The admin selects In Left Side of Screen and saves the settings.
On the user side, when a visitor opens the Sign In or Sign Up page, the Test User Slider Box appears on the left side of the screen.
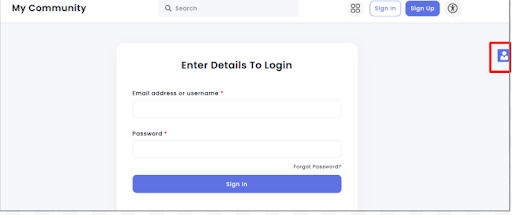
If the admin selects In Right Side of Screen, the Test User Slider Box will appear on the right side instead.
Choose View Type
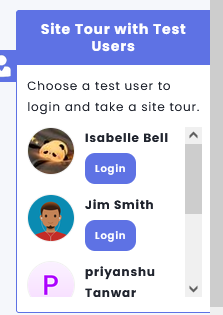
Select how you want the test user accounts to be displayed in the Test User Slider Box. You can choose either List View or Grid View.

On the user side, the available test user accounts are displayed in a vertical list inside the Test User Slider Box.
If the admin selects Grid View, the test user accounts are displayed in a grid layout.
Upload Icon for Box
Choose an icon to display for the Test User Slider Box. Visitors can click this icon to open or close the slider. If you do not select an icon, the default icon will be used.

|
Note: To use a custom icon, first upload it from Appearance → File & Media Manager. Once the icon is uploaded, return to this setting and select it from the list. |
Maximum Test Users Shown
Enter the maximum number of test user accounts you want to display in the Test User Slider Box.

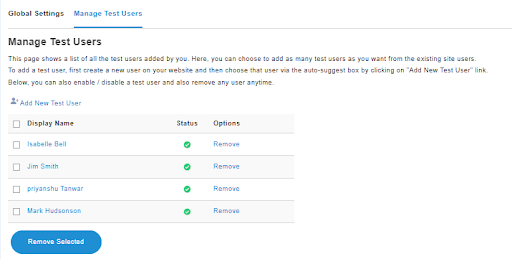
The Manage Test Users section lets you add, manage, and remove the test user accounts that visitors can use to explore your community.
All the test users you add are displayed in a list. From here, you can view their status, enable or disable them, or remove them at any time.
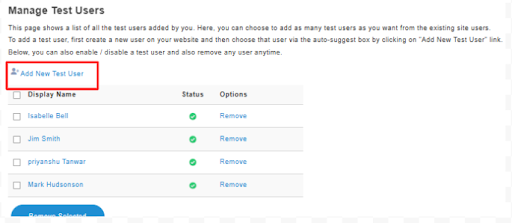
Add New Test User
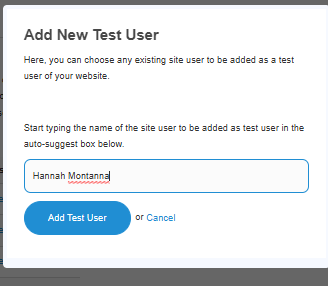
Click Add New Test User to add an existing site member as a test user.
Start typing the member's name in the search box and select the required user from the auto-suggest list. Once selected, click Add Test User to save.
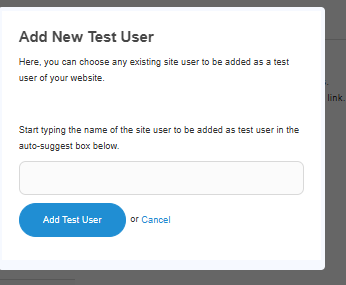
For this example, we have selected an existing user account and clicked Add Test User.
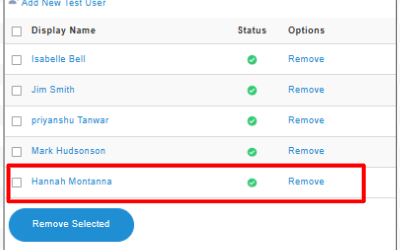
The added test user is now displayed in the Manage Test Users table.
On the user side, visitors can see this account in the Test User Slider Box and select it to log in as a test user.
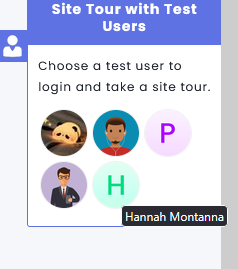
Table to Manage Test Users
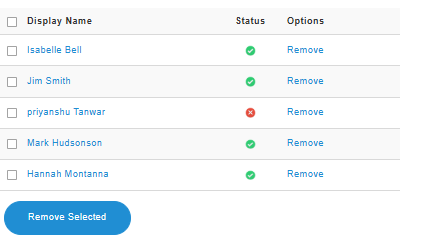
All the test users added to your website are displayed in this table. From here, you can manage each test user with ease.
|
Columns |
Working |
|
Display Name |
Shows the test user name |
|
Status |
Click the Status icon to enable or disable a test user. An enabled test user is available for visitors to use, while a disabled test user is hidden from the Test User Slider Box. |
|
Options |
Click Remove next to a test user to delete it from the list. |
Remove Multiple Test Users
Select the checkboxes next to the required test users and click Remove Selected to delete them in bulk.
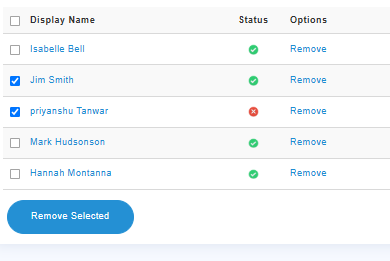
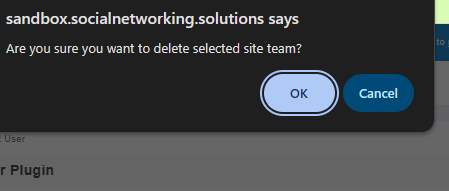
A pop-up will appear to delete the selected users. Click Ok to remove and Cancel to discard.