
Notifications
 Filed in Admin Panel
#SocialEngine
#mobile
#pwa
#Tutorial
#Browser
#Mobile Browser
123 views
Filed in Admin Panel
#SocialEngine
#mobile
#pwa
#Tutorial
#Browser
#Mobile Browser
123 views
The Mobile Settings section allows you to configure how your SocialEngine community appears and behaves on mobile devices. It includes settings for the Progressive Web App (PWA), mobile layouts, themes, app appearance, and other mobile-specific options that help deliver a smooth experience to members using smartphones and tablets.
With these settings, you can customize your community's mobile interface without building a separate mobile application.
What is a Progressive Web App (PWA)?
A Progressive Web App (PWA) is a mobile-friendly version of your website that works like a mobile application. Members can add your community to their device's home screen and access it directly without downloading it from an app store.
A PWA combines the accessibility of a website with the convenience of a mobile app, providing a faster and more engaging experience for your members.
How to Access Mobile Settings
Follow these steps to open the Mobile Settings section:
Log in to your SocialEngine Admin Panel.
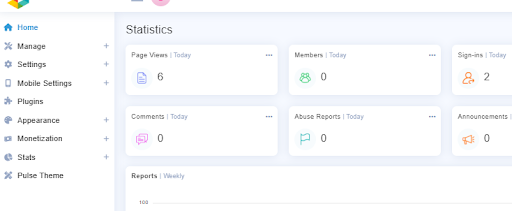
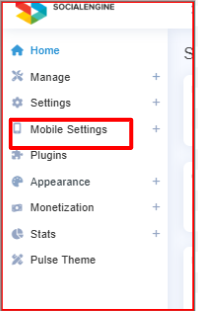
From the left navigation menu, go to Mobile Settings.
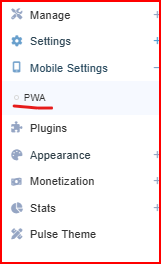
Click PWA from the drop-down.
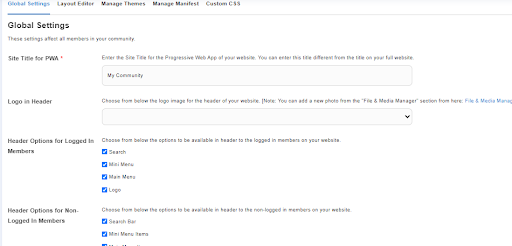
The Mobile Settings page will open, where you can configure the available mobile options.
What You'll Learn
In this guide, you'll learn how to:
Configure the Global Settings for your mobile community.
Customize the mobile layout.
Manage mobile themes.
Configure the PWA Manifest.
Add custom CSS for mobile-specific styling.
The Global Settings lets you customize the basic appearance of your mobile website and Progressive Web App (PWA). The settings you choose here affect how your community looks and how members navigate it on mobile devices.
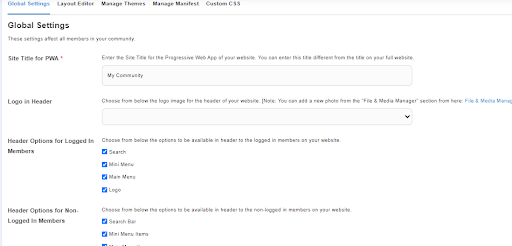
Site Title for PWA
The Site Title for PWA is the name of your community that appears when members add your website to their mobile device's home screen. This title can be different from your website's main title.
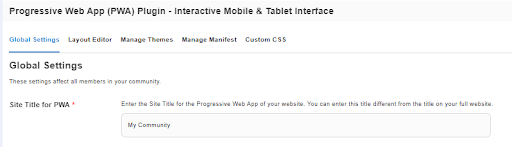
Example:
If your website is called My Community Network, you can use My Community as the PWA title so it looks shorter on a mobile device.
Logo in Header
The Logo in Header setting lets you choose the image of your business or brand that appears at the top of your mobile website.

|
Note: Before selecting a logo, upload it from Admin Panel → Appearance → File & Media Manager. You can upload your website logo or any other image you want to use in the mobile header. |
Header Options for Logged-In Members
Choose which items you want members to see at the top of the mobile website after they log in to your community.
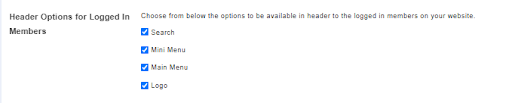
Search – Shows a search icon so members can quickly find content or people.
Mini Menu – Shows quick access options, such as notifications and messages.
Main Menu – Shows the main navigation menu of your community.
Logo – Shows the selected logo in the header.
Select the options you want to display and click Save Changes.
Header Options for Non-Logged-In Members
Choose which items you want visitors to see at the top of the mobile website before they log in.

Search Bar – Shows the search option.
Mini Menu Items – Shows quick navigation options.
Main Menu Items – Shows the main navigation menu.
Website Logo – Shows the selected logo in the header.
Select the options you want to display and click Save Changes.
The Layout Editor allows you to customize the layout of your Progressive Web App (PWA). Using this editor, you can decide which widgets appear on each mobile page and arrange them in the order you want.
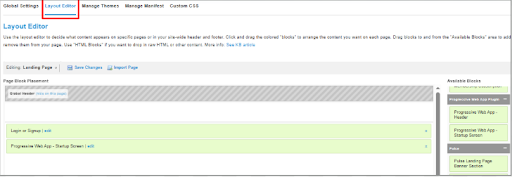
Editing Pages
At the top of the page, you will find the Editing dropdown. Use this dropdown to select the page you want to customize.
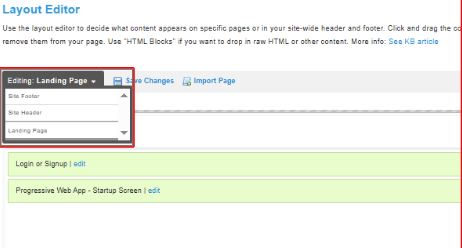
Examples include:
Landing Page
Site Header
Site Footer
Other available PWA pages
When you select a different page, the editor displays the layout for that page.
Page Block Placement
The center section displays the current layout of the selected page. Each green block represents a widget that is currently displayed on that page.
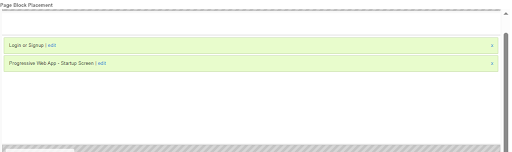
You can:
Drag a block to change its position.
Remove a block if it is no longer needed.
Edit a block to change its settings.
Any changes you make affect only the selected page.
Available Blocks
The panel on the right contains all widgets available for the selected page.
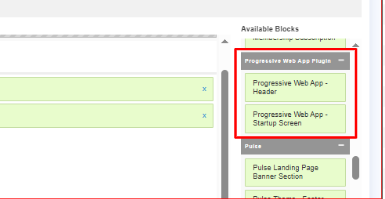
To add a widget:
Locate the required widget under Available Blocks.
Drag it into the Page Block Placement area.
Place it in the desired position.
Click Save Changes.
The widget will now appear on the selected page.
Editing a Widget
Progressive Web App – Startup Screen: This widget controls the splash screen shown while your PWA is loading.
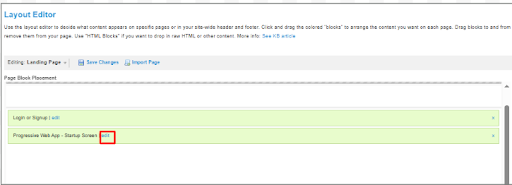
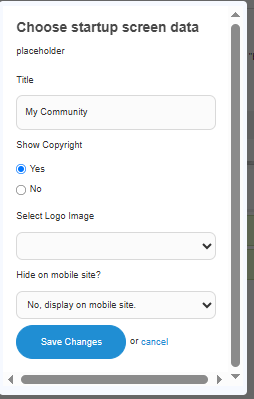
1. Title: Enter the title that will appear on the startup screen.
2. Show Copyright: Choose whether copyright information should appear on the startup screen.
Options:
Yes – Displays the copyright text.
No – Hides the copyright text.
3. Select Logo Image: Choose the image displayed on the startup screen. Click the dropdown and select an available image.
|
Note: Upload your logo or image from Admin Panel → Appearance → File & Media Manager before selecting it here. |
4. Hide on Mobile Site?: Choose whether this widget should appear on the mobile website.
Options include:
Yes, don't display on the mobile site: Hides this widget from the mobile website. Members will not see it on mobile devices.
No, display on the mobile site: Displays this widget on the mobile website, allowing members to view it when using a mobile device.
After making your changes, click Save Changes.
Import Page
The Import Page feature lets you copy the layout of an existing page into your Progressive Web App. Instead of creating a layout from scratch, you can reuse an existing page layout and customize it further.
Click Import Page.
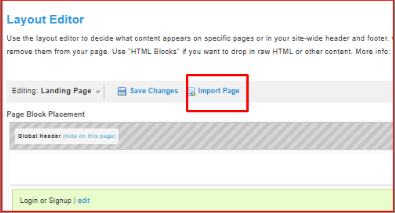
The Import Page into PWA popup will open.
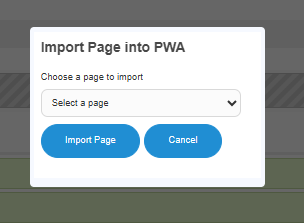
Select the page you want to import from the dropdown.
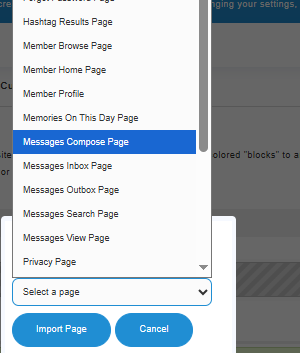
Click Import Page.
The selected page layout will be copied into the PWA Layout Editor. You can then modify the imported layout as needed.
|
Note: Importing a page copies its current layout. Any changes made to the imported layout will not affect the original page. |
For example, we have imported the member home page, so the imported page will appear in the editing widget. From there, you can select the imported page and start customizing the widgets according to your needs.
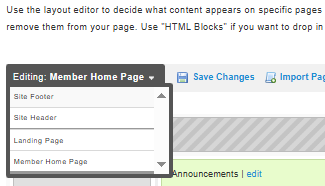
After making any changes in the directory. Don't forget to click Save Changes to save your settings.
The Manage Themes tab allows you to customize the appearance of your Progressive Web App (PWA). You can edit the theme's CSS files, clone an existing theme, export a theme, or activate another available theme.
Using themes helps you match the mobile interface with your website's branding and design.
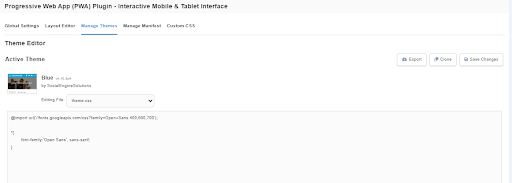
Theme Editor
The Theme Editor displays the currently active PWA theme. Here, you can edit the CSS files that control the appearance of your mobile website.
Editing a Theme File
The Editing File dropdown lets you choose which CSS file you want to edit.
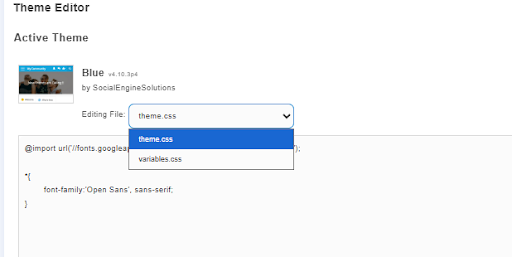
Available files include:
theme.css
Use this file to customize the overall appearance of your mobile website, such as:
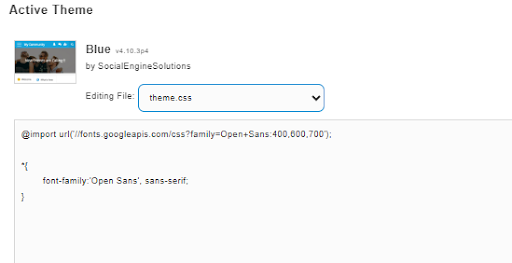
Layout styling
Font styles
Button appearance
Spacing
Other design elements
variables.css
This file contains reusable design values used throughout the theme.
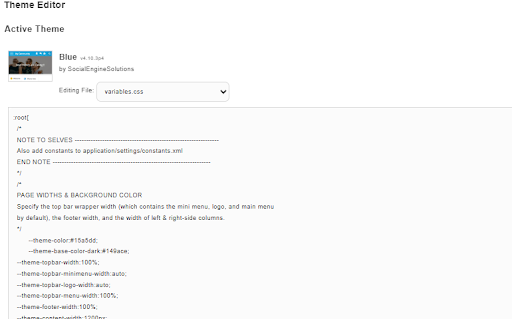
You can modify variables such as:
Primary colors
Background colors
Text colors
Other theme variables
Editing this file updates all elements that use these variables. After editing this file, click Save Changes to apply your changes.
|
Note: Make changes carefully. Incorrect CSS may affect the appearance of your mobile website. |
Clone Theme
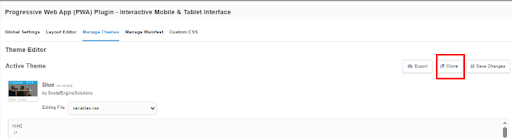
The Clone option creates a copy of an existing theme. This allows you to make changes without modifying the original theme.
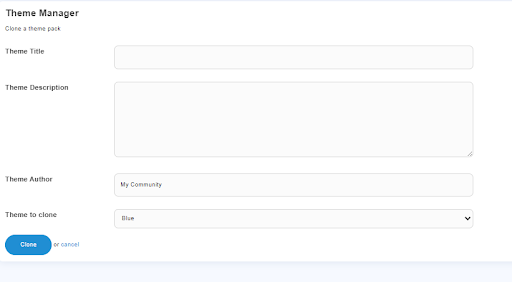
Theme Title: Enter a name for your new theme.
Theme Description: Enter a short description to help identify the theme.
Theme Author: Enter the name of the person creating the theme.
Theme to Clone: Select the existing theme that you want to copy.
Once all fields are completed, click Clone. A new theme will be created, which you can edit independently.
Export Theme
The Export option downloads the current theme to your computer.
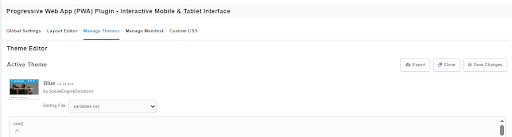
You can use the exported theme to:
Create a backup.
Move the theme to another SocialEngine website.
Save your customizations before making further changes.
Click Export to download the active theme.
Available Themes
When you scroll down, you can find the Available Themes section, which displays all installed PWA themes.
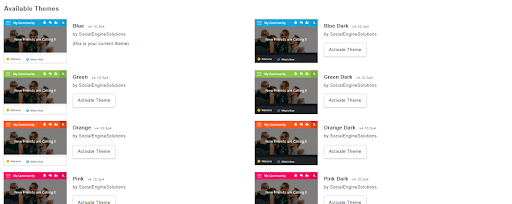
Each theme includes:
Theme preview
Theme name
Version
Author
To use a different theme:
Locate the desired theme.
Click Activate Theme.
The selected theme will become the active theme for your mobile website.
Only one theme can be active at a time.
The Manage Manifest tab allows you to create and manage the Web App Manifest for your Progressive Web App (PWA).
A Web App Manifest is a configuration file that tells the browser how your website should look and behave when it is installed on a user's device. It stores information such as the app name, icon, colors, and description, helping your website provide an app-like experience.
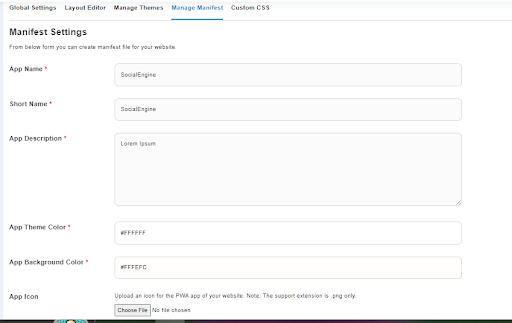
The settings configured here are used when members install your community on their mobile devices as a Progressive Web App.
App Name: Add the full name of your Progressive Web App. It is displayed when users install the app and may also appear in app information on supported devices.
Short Name: Add a shorter version of the application name. It is commonly displayed below the app icon on the device's home screen where space is limited.
App Description: Provides a summary of your community. It helps identify your application and may be used by supported browsers or devices.
App Theme Color: defines the primary color used by the browser interface when your PWA is opened. Depending on the browser and device, this color may appear in the address bar, toolbar, or app header.
App Background Color: Sets the background color displayed while the PWA loads. This color is typically visible on the splash screen before the application opens.
App Icon: Uploaded image displayed when users install your Progressive Web App. It appears on the device's home screen and app launcher.
|
Note: Only PNG (.png) images are supported. For the best appearance, use a high-quality square image. |
The Custom CSS tab lets you add your own CSS to customize the appearance of your Progressive Web App (PWA) without modifying the theme's original CSS files.
Custom CSS is useful when you want to make design changes that are specific to your community while keeping the default theme files unchanged.
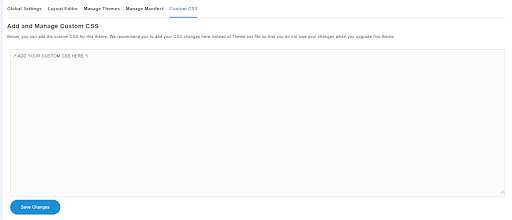
Custom CSS Editor
The editor provides a space where you can enter your own CSS rules. Any valid CSS added here will be applied to your mobile website after saving the changes.
For example, you can use Custom CSS to:
Change font styles.
Modify button colors.
Adjust spacing and margins.
Customize backgrounds.
Update text colors.
Apply other visual styling changes.
After adding or updating your CSS, click Save Changes to apply the changes.
|
Note: Only valid CSS code should be added in this editor. Invalid or incorrect CSS may affect the appearance of your mobile website. |