You’ve just launched your website. Congrats! Now the question is, how do you maximize your user signups right away along with monetizing your community?
One way to entice users to try out your site, and monetize your community, is to set up both Free and Paid plans on your website. That way, users can sign up for free initially for a few days, and then they can upgrade their plan from Free to Paid if they so choose.
The following steps will walk you through the complete procedure to set up this system:
Here’s a scenario where you might want three plans on your site:
- Trial: Users can sign up on the site for free initially, and have full access on the site, but only for limited time period.
- Free Plan: A Free plan with restricted access on the site for an unlimited time period.
- Paid Plan: A Paid plan with full access on the site for an unlimited or limited time period.
Note: Before you create those three membership plans, you’ll first need to create three Member Levels (Trial, Free and Paid members). You can do this in the “Admin” > “Members” > “Member Levels” section. You’ll also need to have your payment gateway(s) set up.
Create a Trial Plan:
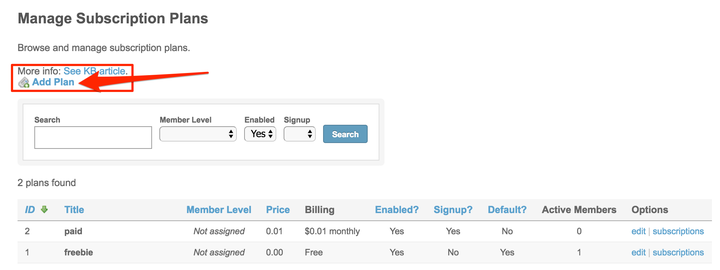
- From the “Admin” > “Billing” > “Plans” section, create a new Trial Plan by clicking “Add Plan”.
- Fill in the “Title” as “Trial” without quotes.
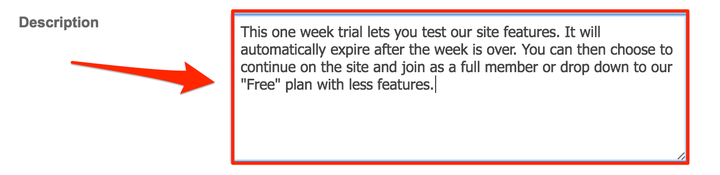
- Fill in the “Description” so members choosing this plan will know details about it.
- For “Member Level”, select “Trial Member”.

- Set the “Price” to zero for this example.

- Set the “Billing Cycle” for this Trial Plan to one-time.

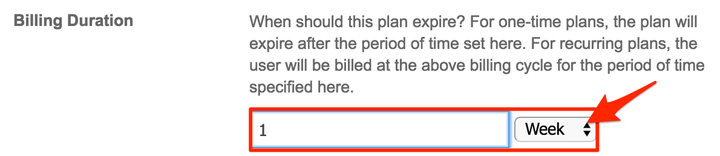
- Set the “Billing Duration” for this Trial Plan to 1 week (or however long you’d like). After the one week trial expires, members will be encouraged to pick another plan in order to continue their membership.
- For “Enabled”, select “Yes, members may select this plan.”

- For “Show on signup”, select “Yes, show this plan on signup.”

- For “Show after sign”, up select “No”.

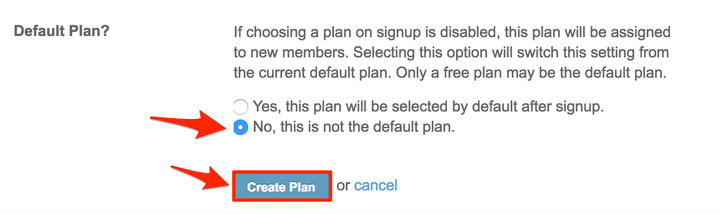
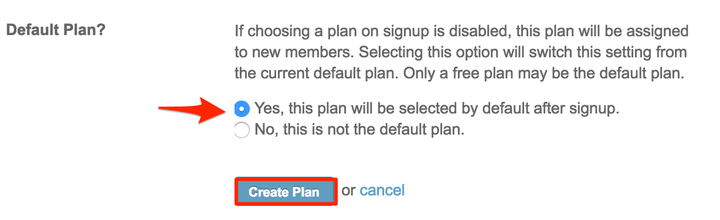
- For “Default Plan”, select “No, this is not the default plan” and then click “”Create Plan”.
Create a Free Plan:
Users on this plan will have free, restricted access to the site per the settings you set for the Member Level (see below for details). This is the default, “Free” plan that members who do not choose a “Trial” or “Paid” plan will go into. Follow steps 1-3 from section “A” above, making changes where appropriate.
- Set the “Price” to zero as seen in step 5 above.
- Set the “Billing Cycle” for this Trial Plan to one-time as seen in step 6 above.
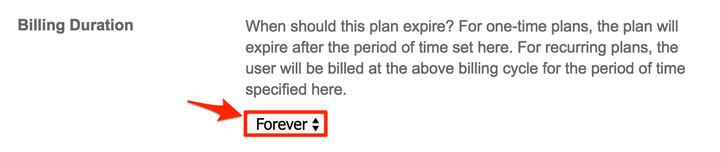
- Set the “Billing Duration” of this Free Plan to “Forever”.

- For “Enabled”, select “Yes, members may select this plan.” as seen in step 8 above.
- For “Show on signup”, select “Yes, show this plan on signup.” as seen in step 9 above.
- For “Show after the signup”, up select “Yes, show this plan after signup ”.

- For “Default Plan”, you can choose either to have this as your default plan if someone doesn’t choose another plan type or you can choose “No”. We chose to have it the default plan for this tutorial. Click “Create Plan”.
Now we need to restrict the site functionality for the members of this “Free” Member Level. Site access can be restricted in two ways: 1) restrict the general access of the site using “Member Level Settings” 2) restrict the access of plugins per Member Level.
Restrict the general access of site using Member Level Settings:
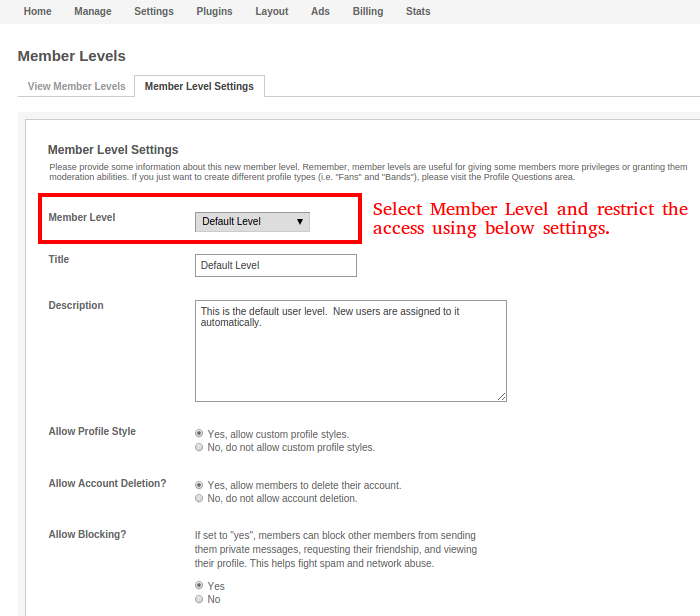
- Go to "Admin" > "Manage" > "Member Level" and click on "Member Level Settings" tab.

- Select the Member Level from the "Member Level" drop-down, and then make the settings accordingly to restrict the site access.
Restrict the access of plugins per Member Level
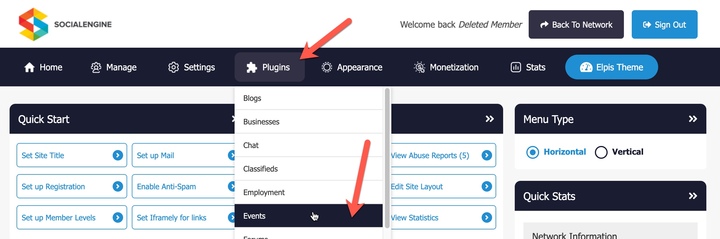
- Go to "Admin" > "Plugins" > "Event” (or any other plugin).
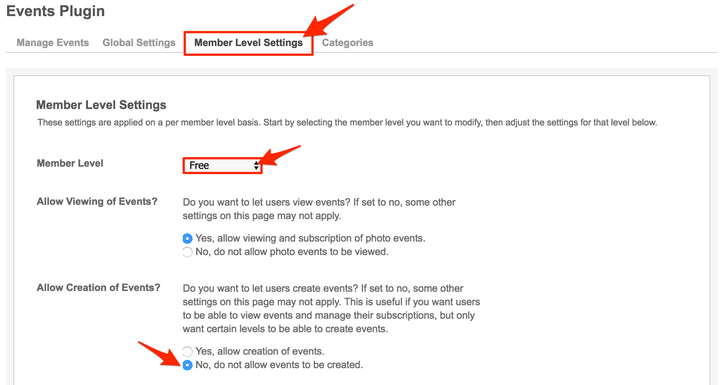
- Click on the "Member Level Settings" tab and make the required changes/settings for that particular Member Level.
Create a Paid Plan:
- Create a new Paid Plan. Follow steps 1-3 from section “A” above, making changes where appropriate.

- Set the “Price” to an amount you want to charge for this membership plan.

- Set the “Billing Cycle” for this Paid Plan how frequently you want it to be billed per: “Week”, “Month”, “Year”, and “One-time”.

- Set the “Billing Duration” of this Paid Plan for when you want it to expire. We chose “Forever” so it will remain active until the member cancels.
- For “Enabled”, select “Yes, members may select this plan.” as seen in step 8 in section “A” above.
- For “Show on signup”, select “Yes, show this plan on signup.” as seen in step 9 in section “A” above.
- For “Show after the sign”, up select “Yes, show this plan after signup ” as seen in step 8 in section “B” above.
- For “Default Plan”, select “No, this is not the default plan” and then click “”Create Plan” as seen in step 11 in section “A” above.
Users will see the above three plans during the signup process and can choose the plan they want. If they choose the “Trial” plan, after it expires they will see a message to choose a new plan: either the “Free” Plan with limited access or the “Paid” Plan with full access.
Great work! Please feel free to contact us if you have any questions or need further tutorials.

 Filed in Tips and Help
#SocialEngine
#Member Subscriptions
#Tutorial
1,914 views
Filed in Tips and Help
#SocialEngine
#Member Subscriptions
#Tutorial
1,914 views