

Networks are generally used for determining what members see in the "what's new" feed, letting members associate with each other based on common profile information (without needing to be friends directly), and serving advertisements to specific groups of members. Each member can join one or more networks if you allow them to, and their networks will be shown on their profile. If you decide to have networks, be sure that they relate to your community's theme or niche. For example, if your community has members from various countries, you can create a network for each country.
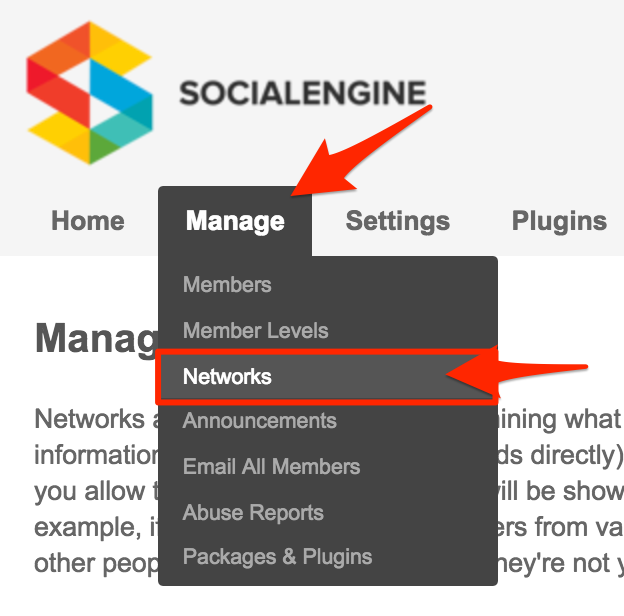
You can manage Networks in your admin panel by navigating to Manage > Networks.
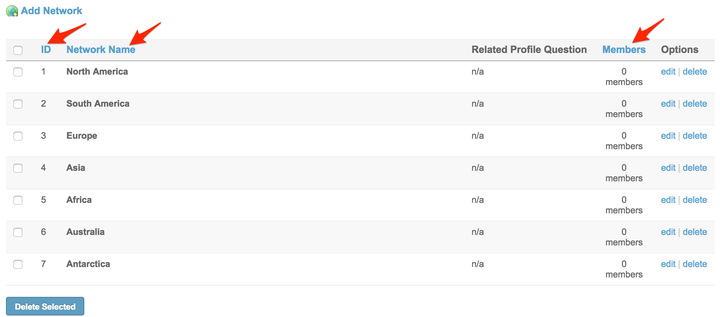
When in the “Manage Networks” page, you can see a listing of each Network. Out of the box, SocialEngine comes with seven Networks corresponding to the different continents. The columns can be sorted by clicking the titles: “ID”, “Network Name”, or “Members”.
Creating a Network
- To create a new Network, click the "Add Network" link.

- You'll see a form like the one below. Give the Network a name and a description.

- The “Member Assignment” setting has three options.

Members can choose to join this network at any time - Selecting this option lets your members choose which Network they belong to on the Networks tab of their Settings page.
Members must be assigned to this Network by an administrator -When you choose this option, members will not be able to place themselves into the Network. You'll need to manually add members to this Network from your Manage Members page.
Members are automatically assigned to this network -Choosing this option enables members to be automatically placed into the Network based on their answer to a profile question.
- “Invisible” allows you to hide membership for this network.

- When you're done filling out the form, click "Save Changes" to create your new Network.

Editing a Network
To edit a Network, click the "edit" link next to the Network you want to modify.

You'll see a form identical to the creation form, but with the Network's values filled in. (See step 2 of “Creating a Network&rdquo Make any changes, and click "Save Changes" when you're finished.
Deleting a Single Network
To delete a Network, click the "delete" link next to the Network you want to remove.

When the confirmation popup appears, click the "Delete Network" button. Note that users within that Network will not be re-assigned to a new Network - the deleted Network will simply be removed from their list of Networks.
Deleting Multiple Networks
You can delete multiple Networks at one time by checking the box next to the Networks that you would like to delete. If you would like to select all the checkboxes you can select the checkbox in the blue header.

When you have finished selecting the Networks you would like to delete, click on the "Delete Selected" button.
You will then be brought to a page asking if you are sure you want to delete the selected Networks. Click "Delete" to delete the selected Networks.
Viewing the Members of a Network
If you would like to view which members are a part of a certain Network, click on the number of members under the "Members" column for the Network you would like to view. A pop up will show with all of the members who are currently in the Network.

Network Usage
Privacy
If you choose to allow it in the Member Levels settings page, your members can restrict their privacy by Networks. For instance, your members can choose to allow only people in their Network, even people with whom they are not friends, to post on their wall.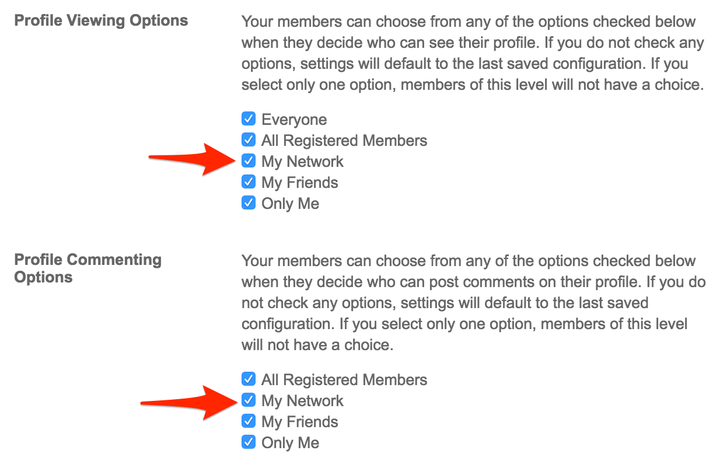
Activity Feed
Via the Activity Feed Settings page, you can choose to make the main "What's New" feed display only information from the user's friends and networks, instead of displaying the activity from every registered user on the site.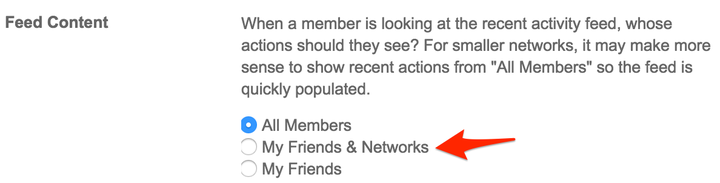
Advertising
When you create a new advertising campaign, you can choose to display the ads only to specific networks. This allows you to target your ads (for example, by gender or country) for more effective returns and click-throughs.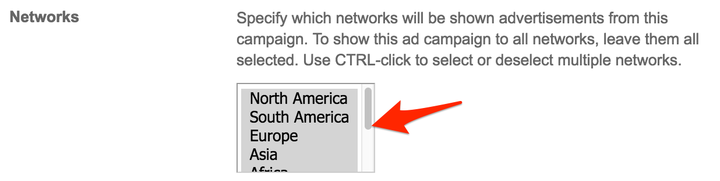
Great work! Networks are such an awesome tool! We’re sure you’ll find lots of ways to use them.
Please feel free to contact us if you have any questions or need further tutorials. Visit our community to have more interactions with us and other clients or third party developers. We’d love to see you there!