
Notifications
Only available for SocialEngine PHP self hosted.
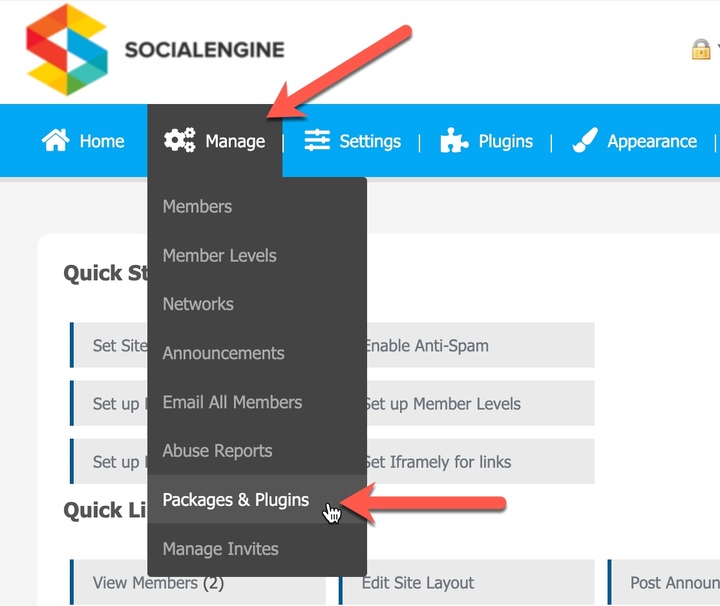
SocialEngine 4 includes a Package Manager that allows you to easily install your plugins straight from your SocialEngine admin panel. Packages are a group of files that can be modules, plugins, widgets, themes, or even language packs. Through the Package Manager, you will be able to install new packages without ever having to worry about which files go where. To install a new package, please follow the steps below. If you are looking to upgrade your plugins, please refer to the Performing Upgrades article.
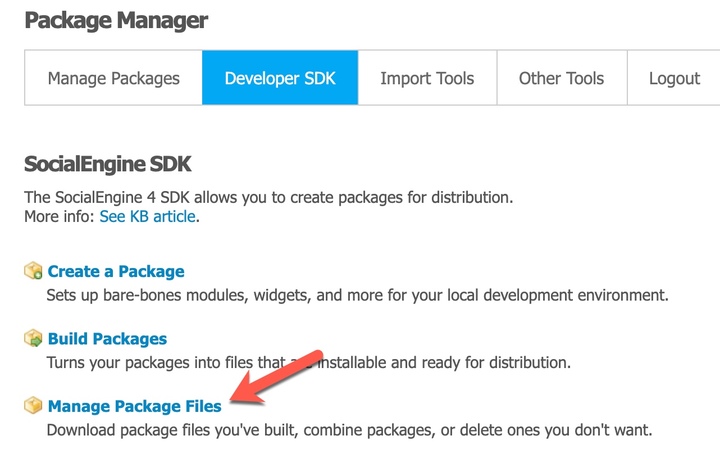
The SDK, or Software Development Kit, helps SocialEngine developers by building skeleton packages and allowing them to package existing ones for distribution. You can also refer to sdk.html in the download for installation instructions. For a technical overview of SocialEngine and a sample plugin, refer to our Technical Overview article.
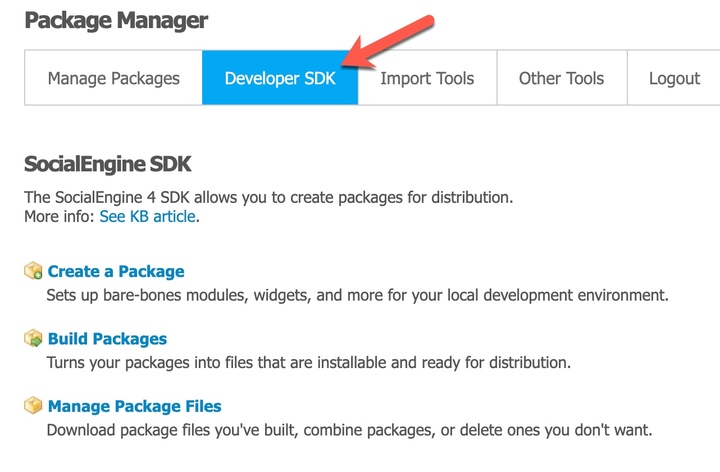
"Create a Package" will create a skeleton package for you, with the proper file system structure and manifest files. You can either install this using the Package Manager or extract it to your SocialEngine installation to start working on it.


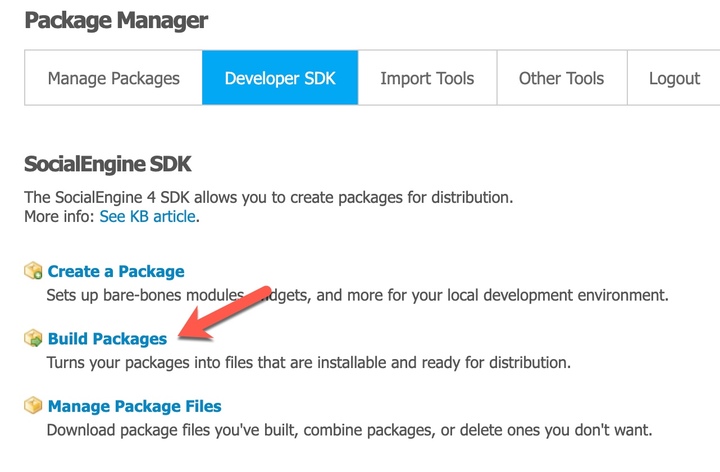
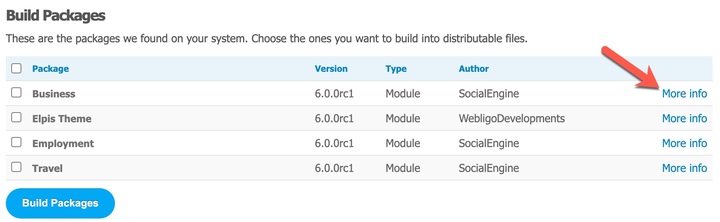
"Build Package" will scan your system for packages that can be installed and distributed. You can select a package, and the SDK will re-build the package manifest and condense it into a TAR archive, which will show up under "Manage Package Files".
If you would like to view more information about the package before attempting to re-build the package, you can click on the "More info" link next to the package for more details such as where the package is currently located and its description.

"Manage Package Files" allows you to download package files you've built, combine packages into a single package for distribution, or delete ones you don't want.
You can download a package you have built for distribution by clicking on the name of the package.
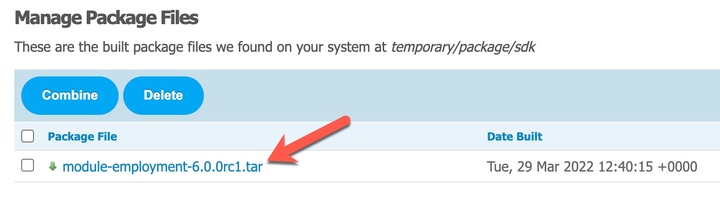
You can combine packages together into 1 file for distribution.

You can remove packages from this page by carrying out the same process as Combining Packages but instead of clicking "Combine" you would click on "Delete" to delete all the packages you have selected at one time.
If you are currently running a Social Engine version 3 site and would like to upgrade to version 4 (you can then upgrade to version 5 or 6), or have a phpFox or Ning site, there are some import tools built into the SocialEngine software to help assist you with the move.
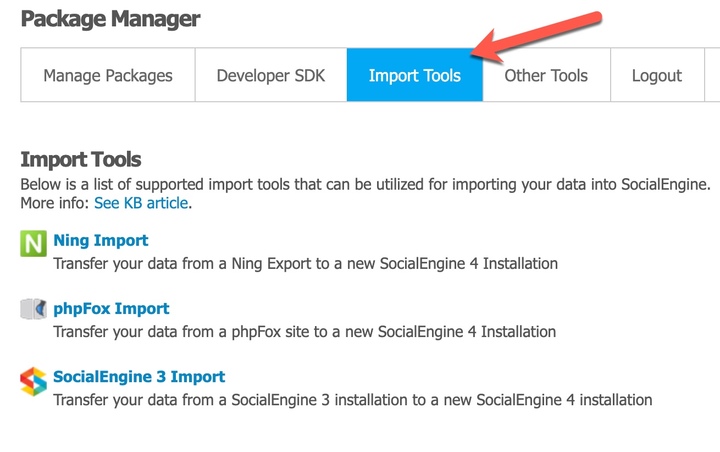
SocialEngine 3 Import: transfer your data from a SocialEngine 3 installation to a new SocialEngine 4 installation. For instructions on migrating from Social Engine 3 to Social Engine 4, please see our article on SocialEngine 3 Migration to SocialEngine 4. This will bring up the import instructions page.
Ning Import: Transfer your data from a Ning Export to a new SocialEngine 4 installation. For instructions on performing a Ning Import, please see our article on the Ning Archive Importer.
phpFox Import: Transfer your data from a phpFox site to a new SocialEngine 4 installation. For instructions on performing a phpFox Import, please see our article on the phpFox Importer.
To assist with error checking and the installation of packages, a few other helpful tools have been included in the Other Tools tab.
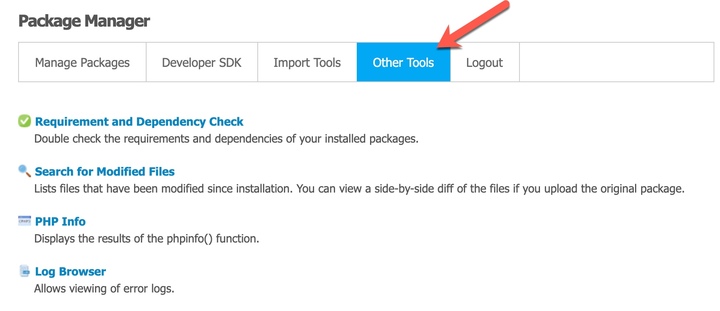
Requirement and Dependency Check - Double check the requirements and dependencies of your installed packages.
Search for Modified Files - Lists files that have been modified since installation. You can view a side-by-side diff of the files if you upload the original package. You have the options to upload package to diff and to flush diff cache.
Upload Package to Diff will take you to the Install Packages page so you can try to upload a new package to see the line by line changes between the packages.
Flush Diff Cache will remove all marked differences and will start keeping track of modified files from now on.
PHP Info - Will show the same information as the Server Information page from the Admin Panel.
Log Browser - Allows viewing of error logs which is the same as the Log Browser page from the Admin Panel.
Logout - Logout of the Admin Panel.
Great work! Please feel free to contact us if you have any questions or need further tutorials. Visit our community to have more interactions with us and other clients or third party developers. We’d love to see you there!
