When building a community it can be very useful to utilize larger, more established social networks to help spread the word. Facebook integration gives you an opportunity to do this by allowing your users to log in to your social network! This can be set up using the Facebook Integration menu within your SocialEngine site's admin panel.
Integrating Facebook into your SocialEngine PHP site is a three step process. First you must create an app, then enter the pertinent information into your SE PHP Admin panel, and finally submit the app to Facebook. The following article will walk you through each step to help accomplish all three tasks.
Creating Your App
- In order for SocialEngine to communicate with Facebook, you will need to create a Facebook application. To setup a new Facebook application, please go to the following URL: developers.facebook.com/apps. Make sure that you’re registered as a “Developer” on Facebook while creating your app.
- Next you need to create a new App. You can do this by clicking the Create App button on the top right of the page.

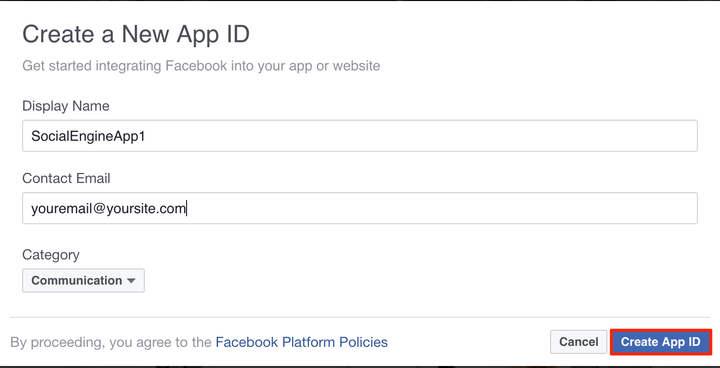
- This brings a popup where you are asked to enter a display name for your app, contact email and choose a category. Click Create App ID once done filling in this info the way you want it.
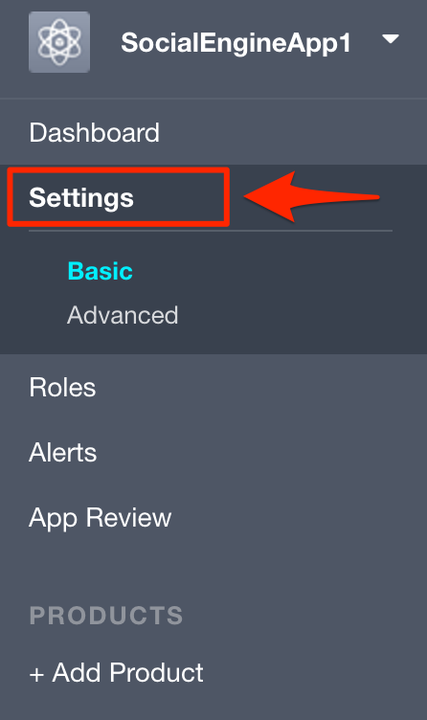
- After you’ve created the App ID above, you’ll be on the page to manage this app and everything it can do. First, you need to enter the website URL. To do that, in the left menu click Settings.
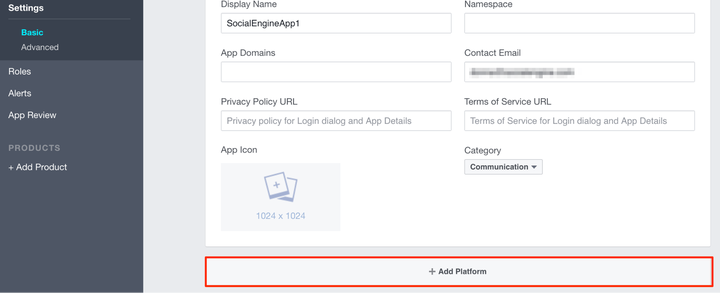
- Scroll down some if on a small screen to see the Add Platform box and click that to open the selection screen.
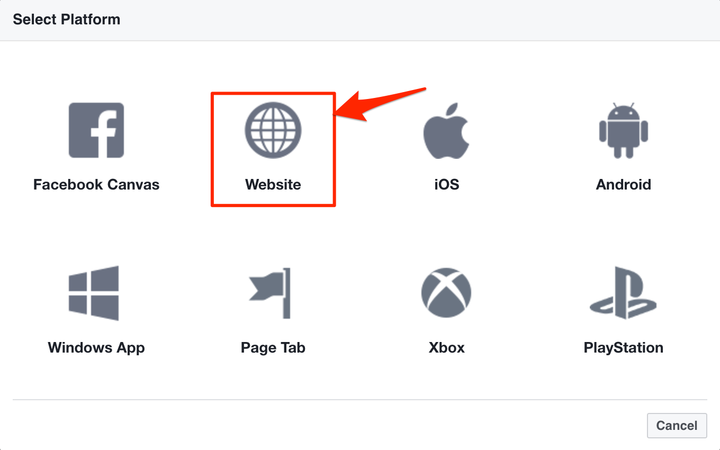
- Choose Website.
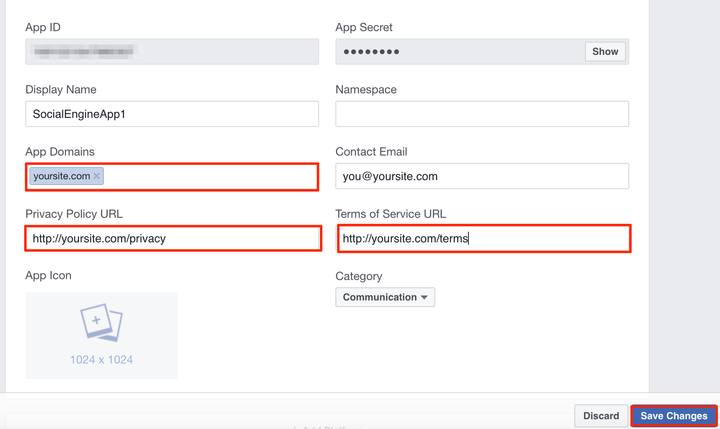
- Enter your website URL in the box. Don’t put it like you see in the screenshot, be sure to put it to your own website URL.

- Enter your domain name in the App Domains box. To make it more likely to be approved, you can also add the Terms and Privacy policy links. Save Changes when done.
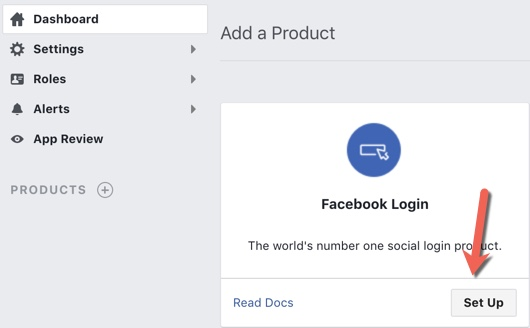
- If using Facebook Login, add the “Facebook Login” product from the right menu by clicking the “Set Up” button.
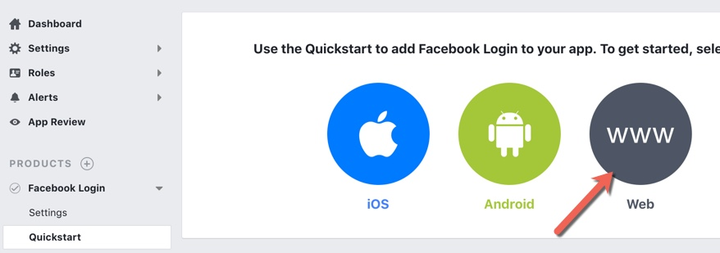
- Select “WWW” from the selections on the right.
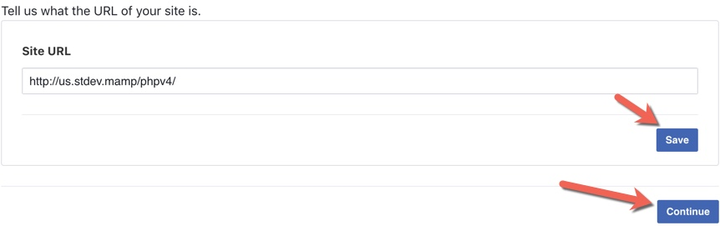
- The URL for your website will already be filled in due to the first step. Click the “Save” button and then “Continue” to go to the next step.
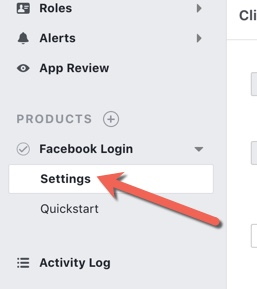
- Click the “Settings” menu on the left as you won’t need to do any of the other steps from the Quick start guide since all of the code is already integrated into SocialEngine.
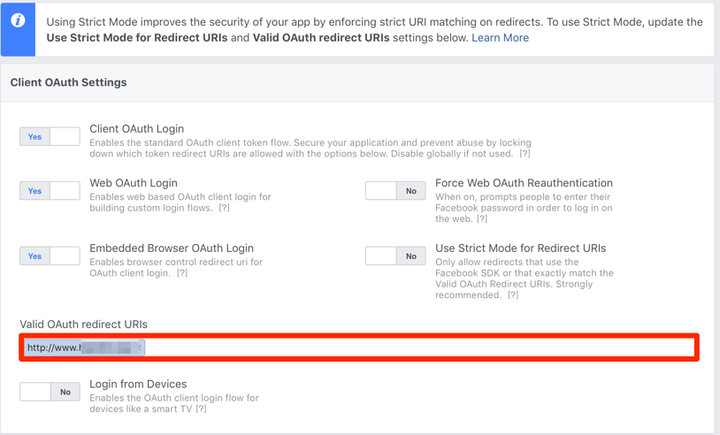
- Strict mode is enabled by default. For older Facebook apps, you’ll need to enable it. Enter Valid OAUTH Redirect URLs for your website. You may want to include both www and non www versions of your url. Example: http://example.com/user/auth/facebook or http://www.example.com/user/auth/facebook

- Double check that your Contact Email and App Domains have been filled in. Click Show so you can see the App Secret as you need to copy the App ID and App Secret to your Admin Control Panel in the next step if you choose to have a custom app. In order for your users to post to Facebook, you do need to go through the Custom App steps which we will show you in the steps below.

Linking to SocialEngine
Once you have created your Facebook app, login to your SocialEngine admin panel and go to the Settings > Facebook Integration settings page. Enter your App ID and App Secret numbers into the appropriate fields, and select login only.

At this point you have completed your App Configuration and user signup via Facebook (fconnect) should work! The “Test Users” (if you create one from “Roles” tab - which we recommend) and the App owner’s registered email address will be able to post to Facebook, but the rest of your user base will not.
Testing your App:
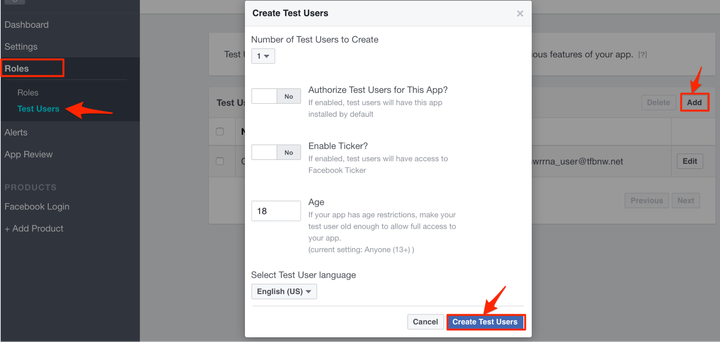
- Head to the “Roles” tab and click on the “Test Users” section and create a few new users from there.
- Open your site in another browser. Click on “Fconnect” button and a pop-up will open asking you to login to facebook.
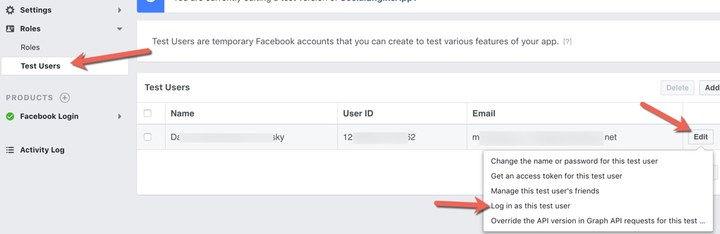
- Log in with the test user’s credentials you have created and complete signup process on your site as well. It’s easier if you log in as the test user in another tab so you don’t need to remember passwords.
Submitting your App for Review by Facebook
NOTE: While creating your Facebook App and submitting it to Facebook, you are required to upload a screencast of Facebook integration on your website.
- Now that you have completed the basic Facebook Integration, the following steps will guide you through submitting your Facebook App.
- Enable Facebook Login by clicking Add Product on the left menu and choosing Facebook Login.
- Click Settings and enter the details for your Facebook Login Valid OAuth Redirect URL, enable "Embedded Browser OAuth Login" and Save Changes. Note: Do not enable Strict Mode.
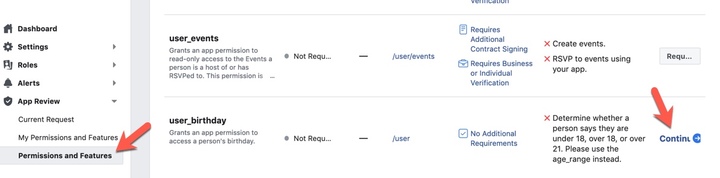
- You need to request "user_birthday" permissions for your Facebook app. Go to your Facebook App that was created using the previous steps. [Note: Wherever you see notes written in brackets, you need to provide those pages, links or URLs according to your website. Also, you need to provide your website's test user’s login details while submitting your app so that Facebook team can review your App easily. You can use above created "Test User" login credentials for this.]
- Go to your Facebook App Settings and click on Basic and verify that you added a Privacy and Terms link as it will be easier to get approved. You can also add your App icon as it requires that.
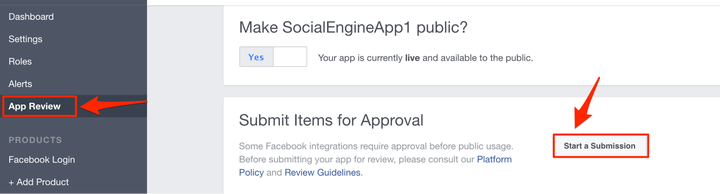
- To start the submission, click App Review and select to Start a Submission. Make sure it’s set to Live (as seen in the screenshot below).
- Select “user_birthday” . Click continue. (This is optional but recommended)
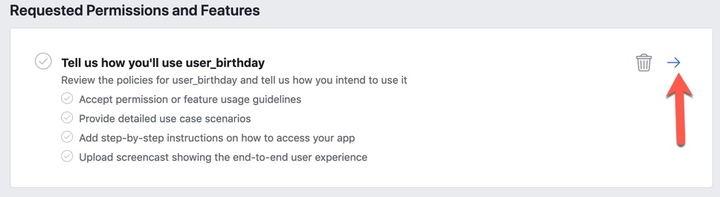
- Fill in why you need the user_birthday by following the step at Facebook.
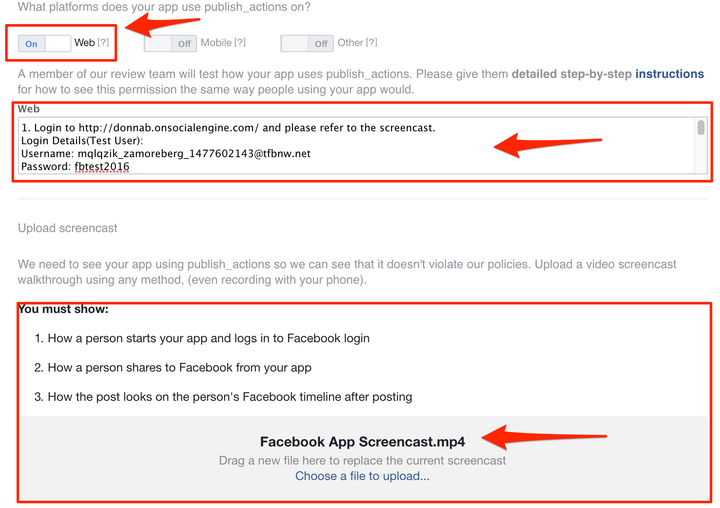
- In the popup for user_birthday, you need to choose Website for the platform and then provide a video and detailed instructions for how Facebook can come test how it works on your site. This is where your test users you created above will come in handy as you’ll need to give Facebook a login for your site.
- Make a screencast of the process and load it to the Facebook review section. The screenshot shows most of the steps but the Web instructions cut off due to their small input box. Be sure to detail as we wrote above though.
- user_birthday:
- Please explain how you are using user_birthday to enhance a person's in-app experience:
We need "user_birthday" permission to access to a person's birth date, including the day, year and month while Facebook sign up.
- Please provide step-by-step instructions so our review team can reproduce how you are using user_birthday in your app:
Steps to test our app:
- Go to http://mywebsite.com. (Note: Give your site’s login page URL here.)
- Now login to facebook account using "Fconnect" button with the below details(Test User), please refer to "Login_Page" screenshot:
- - Username: xxxxxx@yyy.com
- - Password: **************
- After successfully logging-in to facebook, you will get Facebook permission pop up requesting to access your personal information from Facebook, click on "Okay", please refer to "User_Birthday_1" screenshot. Now, a page will appear to accept terms and conditions of our site, please refer to "User_Birthday_2" screenshot.
- Now, personal information page will appear. Some fields will appear as pre-filled using the Facebook account, please refer to "User_Birthday_3" screenshot.
- Once you think it’s complete, and have attached the video, click Save to start the approval process.
- Click Submit for Review when you are ready.
NOTE: Wherever we have written some notes in brackets, you need to provide those pages, links or URLs according to your website. Also, you need to provide your site’s test user’s login details so that Facebook team can review your App easily.
Great work! Please feel free to contact us if you have any questions or need further tutorials. Visit our community to have more interactions with us and other clients or third party developers. We’d love to see you there!

