
Notifications
Use the Layout Editor to decide what content appears on specific pages of your community, or in your site-wide header and footer.
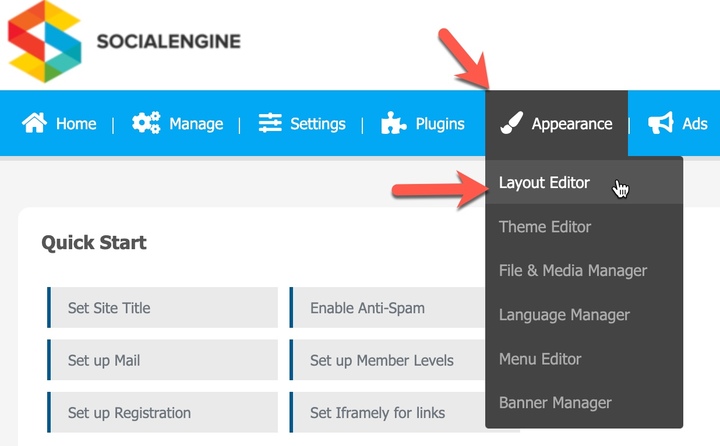
To reach the Layout Editor, in your Admin panel navigate to Appearance > Layout Editor.
The default page selected when opening the Layout Editor is the visitor “Landing Page” as seen in the screenshot below:

To select a different page to edit, click on the arrow button to the right of the currently selected page (in our example, “Landing Page”).

This will open a drop down list of pages that you can select to edit in the Layout Editor. Click the page that you want to edit and it will open in the editor. In our example below, we selected the “Member Home Page.”

Please note that not every page in SocialEngine can be edited using the Layout Editor. If you do not see the page that you want to modify in the "Editing" list, you will most likely have to modify some of SocialEngine's code to alter its content.
To delete a page, click on "Delete Page" in the Layout Editor menu bar. This will delete the currently selected page. In our screenshot below if we clicked to delete, we would delete the “Member Home Page” as that is the page selected.


Here’s more information about the input fields and settings for the “Edit Page Info” screen shown above:
The name that will show up on the drop down list when you select a page to edit. This name is purely for your own reference for use in the Layout Editor. On the above screenshot, notice we put the Page Name as “Games.” This page will show at the bottom of the Layout Editor “Editing” list.

This field is where your enter the last part of the URL in order to link directory to this new page. You can reference the page by going to {your domain}/pages/[Page URL]. For example, the Page URL in the screenshot is “games”. If my domain was http://www.mysite.com then to access this page I created, I would go to http://www.mysite.com/pages/games .
The page description should be a brief, concise description of this page. Include any keywords or phrases that you want to appear in search engine listings. This will be the basis for your HTML "meta" description tag. There are two places where you can add data for your "meta" description tag. The site description found on the General Settings page will be on every page on your website under the "meta" description tag. There is also this page description which will give just this page its own "meta" description tags which will be in addition to the site description. Please know that a good page description will increase SEO.
Provide some keywords (separated by commas) that describe this new page. These will be the default keywords that appear in the HTML "meta" tag in your page header. Enter the most relevant keywords you can think of to help this page's search engine rankings. There are two places where you can add data for your "meta" description tag. The site description found on the General Settings page will be on every page on your website under the "meta" description tag. There is also this page description which will give just this page its own "meta" description tags which will be in addition to the site keywords. Well thought out keywords can help your SEO.
For our “Games” page, we added the following for the Page Description and Page Keywords.

Select which Member Levels will be allowed to see and access this page. The Member Levels highlighted in blue will be able to access the page, whereas the Member Levels that are on a white background will not be able to access the page. You can select or de-select a Member Level by clicking on its name. To select multiple Member Levels hold down the “Control” button while clicking when using a Windows computer or hold the “Command” key while clicking on Macintosh computer. You can also hold the “shift” key while dragging the mouse and select multiple concurrent Member Levels.
Click the “Edit Columns” button to choose how many columns you want to have on this page. Choose a layout by clicking on the one that fits your page best. The horizontal blocks on the top and the bottom represent the “Site Header” and the “Site Footer”, which do not need to be displayed.

Click and drag the colored "blocks" to arrange the content you want on each page. Drag blocks from the "Available Blocks" area on the right into the "Page Block Placement" area to add them to your page.
For a more control over what is displayed use an "HTML Block" if you want to add your own custom HTML code or other commonly available code snippets.
The example shown below shows adding the "Activity Feed" to the center column of the page.

NOTE: All blocks cannot be used on all pages. For instance the blocks that begin with “Profile” can generally only be used on the Profile pages (Member Profile, Group profile, etc.). Please see the following article for a list of Which Widgets are Allowed on Which Pages.
You can drag blocks from the "Page Block Placement" area into the "Available Blocks" area to remove them from your page or click on the blue "x" in the block you want to remove.

Click on "edit" on the content block to change any of the parameters that this content block may allow you to modify.

This block allows you to edit the "title". The title will display in bold print right above this content block on the page where your are placing it.
Some blocks such as the announcements block allow you to limit the number of items to show and other options.

Depending on which theme you are using your site, your Global Header and Footer may look different. The default Global Header is typically everything above and including your main navigation (inside the Red Box in the illustration below). The default Global Footer is generally the links on the bottom of the page (inside the Green Box in the illustration below).

The Global Header and Footer is normally located on every page of your site for easy and uniform navigation. However, you are able to choose whether you would like to display the Global Header and Footer on any of the pages that are editable in the Layout Editor. If the Global Header and Footer are currently being displayed on your page, click on either of the “(hide on this page)” links that are located next to the Global Header or Global Footer to hide them on the current page.

If the Global Header and Footer are already being hidden, then you will see “(show on this page)” link instead. Click on either of those links to display the Global Header and Footer once again on your site. The Global Header and Global Footer are tied together. The software does not come with the ability to disable or enable just one of them.
Click on the "Save Changes" button in the Layout Editor menu bar to save all of the changes that you have made to the layout.

Whether you want to move one of the existing SocialEngine menus around in your layout or add a custom-created menu, the Layout Editor can do it! Follow the instructions below.


The "Title" field allows you to give your menu a title. This title will appear above the menu as a headline in your interface. Leave this field blank if you don't want a title to appear above your menu.
Next, in the "Menu" drop-down, select the menu you want displayed. Your custom menu should appear in this list along with all the standard SocialEngine menus.
To learn more about customizing menus in SocialEngine please see our menu editor learning center Article: Menu Editor
You can specify a CSS class to be applied to the unordered list of menu items. This will allow you to style your menu by defining the styles for the menu using your Theme Editor.
If you have the mobile plugin, this option will be available which allows you to choose whether you want to show this menu on the mobile version of your site or not.
Click "Save Changes" to close the popup.
Remember to click the "Save Changes" link at the top of your Layout Editor to finalize the changes you have made.
