
Notifications
The Language Manager is a powerful tool that can help transform your site into a custom community. Whether you want to completely translate your SocialEngine site into a different language, or simply change a phrase such as "Friends" to "Connections", this article can help!
If your goal is to translate your site into a different Language, follow the instructions below.
Navigate to Appearance > Language Manager in the Admin menu.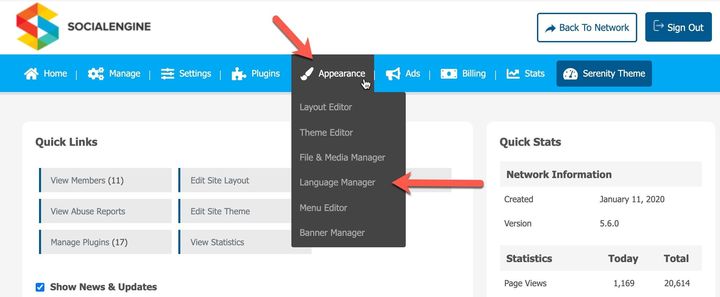
Click "Create New Pack".
When the page loads, select the Language that you are creating the new pack for. There might be multiple selections available for a specific Language. For example, for Spanish there are different options such as "Spanish (Chile) [es_CL]", "Spanish (Columbia) [es_CO]", etc. These different locations that are sometimes specified are associated with Unicode Locales. These allow the site to automatically select a Language if the member viewing the site is from that specified locale. For instance, if we select "Spanish (Chile) [es_CL]" and a new member to the site has their PC's locale set to Chile, then the site will automatically select the "Spanish (Chile) [es_CL]" Language pack to show to the member even if the English Language pack is selected by default.
Click the "Create" button shown above to save your new Language pack.
On the main list of Language packs, click the "edit phrases" link next to the Language pack you just created.
You should see a list of Language variables as seen in the screenshot below.
Beneath each text area is the original phrase in English. Type in your translation for the phrase in the corresponding text area. Be sure to click "Save Changes" when you're finished
Sometimes, all you want to do is change the wording of a particular phrase. For instance, you may want to change the word "friends" to "connections. Follow the directions below to do that.
Click the "edit phrases" link next to the English (or default) Language pack.
Search for the phrase you'd like to change. 
When the list of Language variables comes up, edit the ones you want to change, and click "Save Changes".

Search for specific phrases using the search area at the top of the "Edit Phrases" page. Display all un-translated phrases by filtering by "Missing" phrases.
Some phrases contain strings such as %1$s. These are placeholders. For example, in the phrase %1$s said: it is a placeholder for the member's display name. You should make sure that your translation contains that string as well.
Some phrases have the text "This phrase is pluralized. Example values: 1" or "This phrase is pluralized. Example values: 2, 3, 4." To understand this text, here’ an example. Suppose the phrase is "member." When you see the text "This phrase is pluralized. Example values: 1," enter the singular of the phrase - in our example, you would enter "member." When you see the text "This phrase is pluralized. Example values: 2, 3, 4," enter the plural of the phrase - in our example, you would enter "members."
There may be occasions when you want to add a phrase to your Language pack. To do that, edit the Language pack and click the "Add New Phrase" button. 
Enter your phrase, and click “OK” to save.

If you would like to export a Language pack so that you can edit it using a different editor or offline on your own, you can click on the "export" link next to a default Language pack such as the "English [en]" Language pack. It will then give you a CSV file that you can either open and view or save it somewhere on your computer.

If you have multiple packs installed, the pack you've marked as your "default" will be the Language that displays if a member has not specified their Language of choice. For example if a person goes to your site for the first time, the Language the site will be displayed in will be the "default" Language. To select a Language pack to be your default Language, select the "make default" link next to the Language pack that you would like to make the default.

If you have a Language pack that you want to install, you can import the Language pack by clicking on the "Upload New Pack" button.

It will then ask you which Language that you want to select. This works similar to creating a new Language pack above, where the Language selected could affect the auto selection depending on the locale of the member. Click on the "Choose File" button to select a Language pack from your computer to upload.

When all fields have been filled out, click on the "Upload" button to upload the language pack to your Language Manager.
