If you want to monetize your site, you’ll need to enable one or more payment gateways. SocialEngine PHP has default gateway support for Paypal, cash, bank cheque and also supports free subscriptions. This tutorial will walk you through the process to set up these payment options.
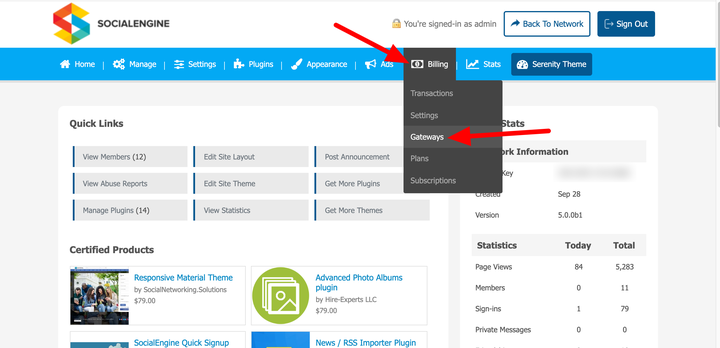
To enable a payment gateway, go to the Billing > Gateways menu item in your admin panel.
PayPal Gateway
If you don't yet have an account, you can create one at PayPal's website.
- Establish a business PayPal account: https://www.paypal.com/signup/account
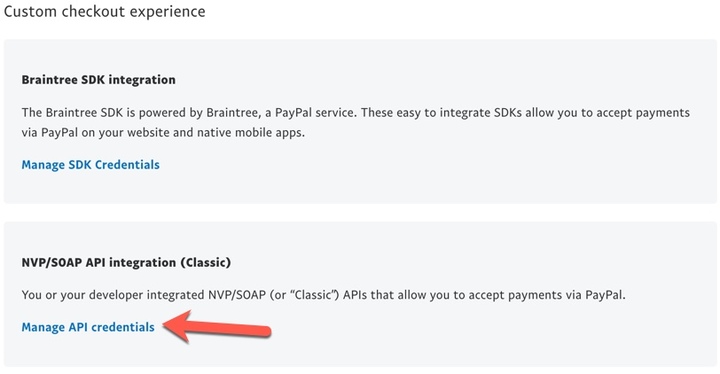
- Navigate the API Access page. To create new credentials, under "Custom checkout experience," find “NVP/SOAP API integration” and select “Manage API Credentials”.
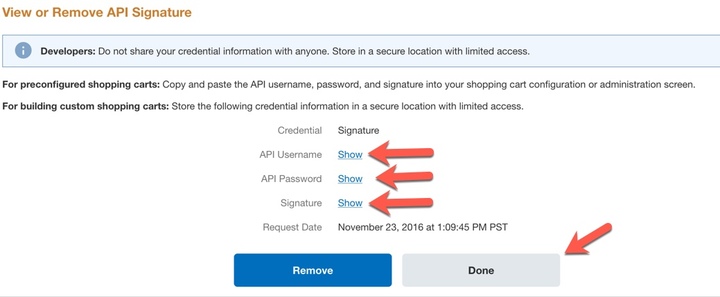
- On the next page, click to show the "API Username," "API Password," and "API Signature." For more information, see Creating and Managing Classic API Credentials. If you have existing API credentials, you can also use this shortcut to review them: https://www.paypal.com/us/cgi-bin/webscr?cmd=_profile-api-signature
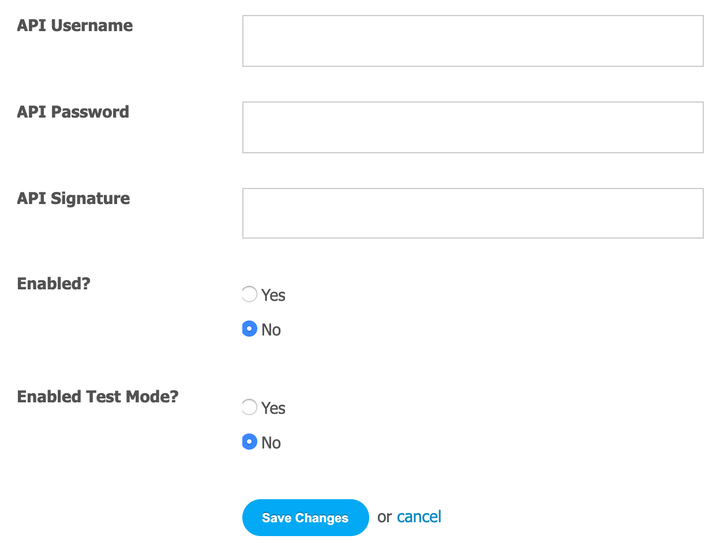
- In your Admin panel, go to Billing > Gateways and click “edit” to the right of PayPal.

- Insert the PayPal API username, password, and signature values into this form and click “Yes” for “Enabled”. If you want to test payments, you'll also want to enable test mode. “Save Changes” when done. Note: If you enabled test mode, be sure to disable it once you're ready to start accepting payments.
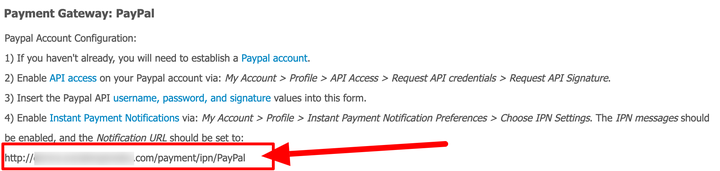
- At PayPal, enable Instant Payment Notifications via: My Account > Profile > My Selling Tools. Expand “Getting paid and managing my risk” if needed and check “Instant payment notifications”. Click “Update” and add or edit settings. From this page, you can enable or disable the IPN service and enter your “Notification URL”. The IPN messages should be enabled. Set the “Notification URL” to the one where you want to receive IPN messages. (For example: http://www.domain.com/payment/ipn/PayPal
 Note that the Notification URL will show in your Admin panel in the PayPal edit screen.
Free
If you want to allow free subscriptions, you can enable this setting. Click "Edit" to the right of "Free."
Select "Yes" to enable free subscriptions and then click to save changes.
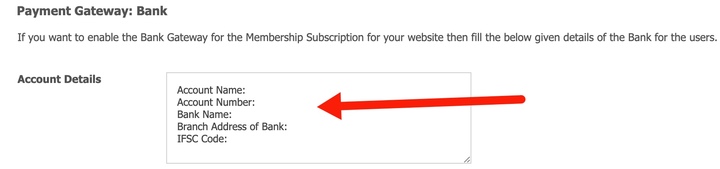
Bank
To allow members to pay via bank transfer, enable this setting and add your bank details for the transfer.
- Click "Edit" to the right of "Bank."
- Enter your bank details.
- Choose whether it will be mandatory for the member to upload a bank receipt to prove payment.
- To enable bank payments, choose "Yes" for "Enabled." Click to Save Changes when done.
Cash
You can enable cash payments to allow offline payments from members via cash.
- Click "Edit" to the right of "Cash."
- Choose whether to require the member to upload the cash payment receipt.
- To enable this payment method, click "Yes" and then Save Changes when done.
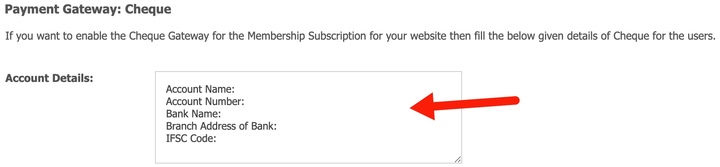
Cheque (Check)
You can enable payments via cheque (check) by filling in and enabling the following settings.
- Click "Edit" to the right of "Cheque."
- Fill in the cheque details however you need them for your location. You may need to add or remove details in the input box.
- Choose whether to require the member to upload the cheque payment receipt.
- To enable this payment method, click "Yes" and then Save Changes when done.

