
Notifications
The Elpis Theme has special settings and configurations allowing you more control over the design of your site.
When working with Elpis, it's very important to enable development mode after changing any settings for this theme. We recommend that you enable and then immediately disable development mode after doing any changes for this theme.
It is also very important to work on a clone rather than the main theme in case there are any errors, or if you need support or upgrades. Working on a clone ensures that the main theme isn't modified which can cause issues for upgrades or support. Note that when working on a clone, you'll need to also save the changes to your theme by following this guide under the section "Editing the CSS Style of a Theme."
You'll need to be logged into your Admin Panel.
To the far right of the admin panel dashboard menus, click "Elpis Theme."
You have a few choices for your guest landing page design and layout. To choose one, click the bubble to the left of the choice and save changes when done.

The following screenshots are for the default style. Your style choice may look different.
Layout 1
Layout 1 gives a layout with various widgets, a banner and widgets for custom text and images.

The banner, widgets and popular blog widgets are controlled via the Layout Editor. Click "Edit" to edit one of the widgets or click "x" to delete.

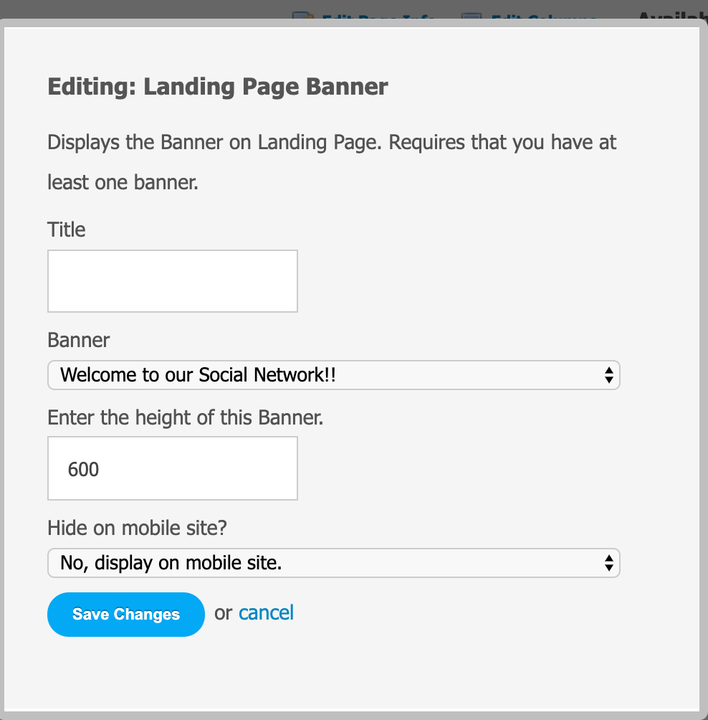
Landing Page Banner
You can edit the landing page banner to change the banner and height. You need to have uploaded a banner in order to choose one. The default height is 550.

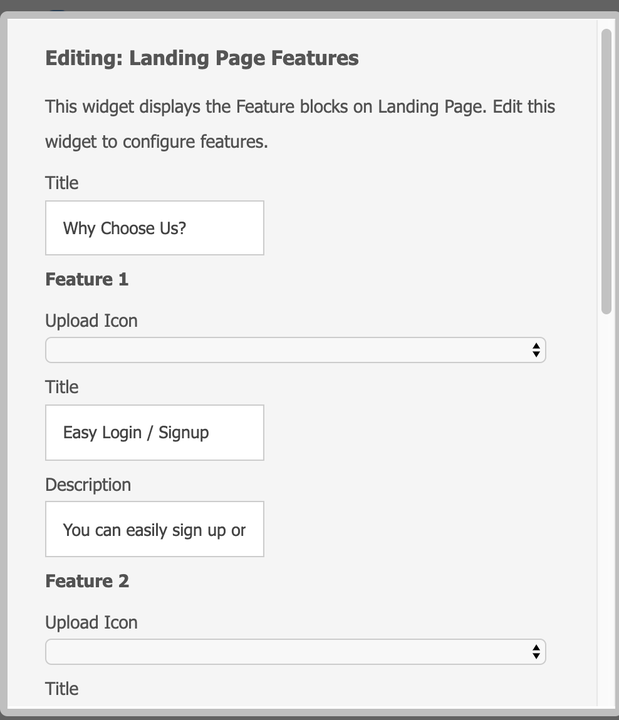
Landing Page Features
The landing page features are the text and image widgets seen under the banner. Edit the widget to change each as you want it.
Landing Page Parallax
The parallax is the banner that scrolls up with the page.

You need to have uploaded a banner in order to choose one. The default height is 300.

Landing Page Popular Blog Entries
You can set the title, amount to show and which way you prefer the blog entries to show - popular by views or comments.
Landing Page Members
This widget shows popular members with the most views. You can change the title and amount of members to show.
Layout 2
Layout 2 has a more compact landing page and shows an image and login widget. You can change the image by following the log in image banner tutorial.

Header Options for Logged in Members
Choose the header options for members that are logged in by checking or unchecking the boxes to the left of each selection.
Header Options for Non-Logged in Members
Choose the header options for guests by checking or unchecking the boxes to the left of each selection.
Widget Corner Radius
You can control the widget corner radius which helps keep the design as you want it.
Be sure to Save Changes when done!
You can choose from three color schemes or make your own. Click the "Color Schemes" tab to view the choices.

Choose a color by clicking it and clicking "Save Changes.
Create a new theme by clicking "Add New Custom Theme." (Recommended if you want to change colors and other CSS or the theme layouts.)

Enter the new theme name and choose which theme to clone. Save changes when done by clicking "Create."
You can configure the font settings for this theme on your website. You can also choose to enable Google Fonts or use web safe fonts. Click the "Manage Fonts" tab to configure your fonts. Be sure to save it after.

Remember to enable and disable development mode after making any changes!
